Tuesday, April 22, 2014
Monday, April 21, 2014
Regenerating the Envelope of Absolute Towers
In this Project, I tried 4 ways to regenerate the envelope of the Absolute Tower.
For alglorithm, I mainly use Voronoi, WeaverBirdsand Paneling tools. Besides, I also use
Python script to generate a certain kind of skin. I will introduce the 4 kinds of skin one
by one in the following part.

Skin 1. This is the first skin. The flowing windows.
I tried to create flowing windows for the tower. There are 56 planar curves to loft the basic shape. First I use Dispatch node to split the 56 planar curves into 2 lists. One list is the upper curve of a certain level and the other list is the lower curve of a certain floor. Then I use random node to move a series of interpolate points of each list. After getting the new interpolate points, I can generate two lists of new curves. Finally, I loft them to get the flowing windows. If you use the slider of random seed, you can get different shape of the windows.
In this way, the shapes could be easily controlled by changing the seed of Random node. It looks like the windows are flowing when you sliding the number slider.

This is the rendering of the first skin. You can notice that the random and irregular shape of the curtain wall.
Skin2. Voronoi skins and Paneling Tools

About the second skin, I use Voronoi and Paneling Tools to generate a random honeycomb pattern as the envelope. First I create a 1*1 grid as the modular of the voronoi pattern. And then after several steps I could get new random points based on this 1 by 1 grid. Using these random points, I connect them to Voronoi node and get the honeycomb lines. Finally I offset these lines and rebuild the curves, in this way I could get the modular pattern. Then I go back to Rhino, use the command "flow on surface" to attach the pattern on surface.

This is the rendering of part of the building. My laptop is too slow to run the calculation load, so I just attach the pattern on a small portion of the building to represent the final effect.
Skin 3. Trangulation of 2D Pattern

The third skin is turning the photos to a digital and pixel skin. Here is the basic idea: we randomly arrange points within the picture region, and then we generate dalaunay trangulation. In the center of each triangle, we snap the RGB value based on center point and then turn them to trangular colored region.
The first step is to change the picture to delauney trangulation. Populate a 2-D mesh region with 1500 points. By using Delauney node, the mesh is exploded into several triangular faces. Then use a image sampler to regenerate the new pattern with repeating colors.

Then I use several steps to regenerate the 2D picture mesh to a new 2.5D mesh. This new mesh is like a relief. You can see the small polygon subdivisions has different tilting angles and different Z height. In fact, the small subdivisions are fit to the face's contour. The light the skin is, the higher the subdivision is. The darker the skin is, the lower the subdivision is.


Skin 4. Colored Point Envelope (python scripting)

The first step is to bake the tower's original envelope to mesh and bake the points on mesh. Then we define a function called createColoredPoint, by giving it x,y,z value and r,g,b value, we can generate plenty of colored point on mesh. And these colored points have various color ranging from a light level to the dark level. You can change the expression of r,g,b to get different effect.
I think it my use as a way to compare the different neo lights on buildings in night.


Tuesday, March 25, 2014
Generating Process of Absolute Towers


 |
| Basic floor plan. |
 |
| 1. Array 56 curves |
 |
| 2.Rotate these curves using rad node to get the general shape. |
 |
| 3. Use planar node and extrude these curves to get the floors. |
 |
| 4. Generate the top floor (roof). |
 |
| 5. Use horizontal frames to locate the small railings on the top floor and extrude them. |

6. Generate the glass handrails inside the floor curve.
 |
| 7. Extrude the small railings on the glass handrails. |
 |
| 8. Generate core tube inside. |
 |
| 9. Generate the glass wall hanging outside. |
 |
10. Generate several rays from the center of the core tube, then I can get the intersection of these rays and floor curves. Connect these intersections through a line. Finally extrude these line so I can have these bearing walls.
|

11. Use several steps to extract the start points,the end points, and the points between them to loft, in this way we can get the second skin.The whole form is finished.

12. Use wind force, gravity, and spring force as three sets of stress to deform the glass screen. The glass screen will deform under these three forces.( I only extract part of the shape to run kangaroo node, because the calculation load would be too heavy for the whole shape.)

13. Finally, use several node to test the area, boundary, curvature,and edge points... of this part.
Monday, March 24, 2014
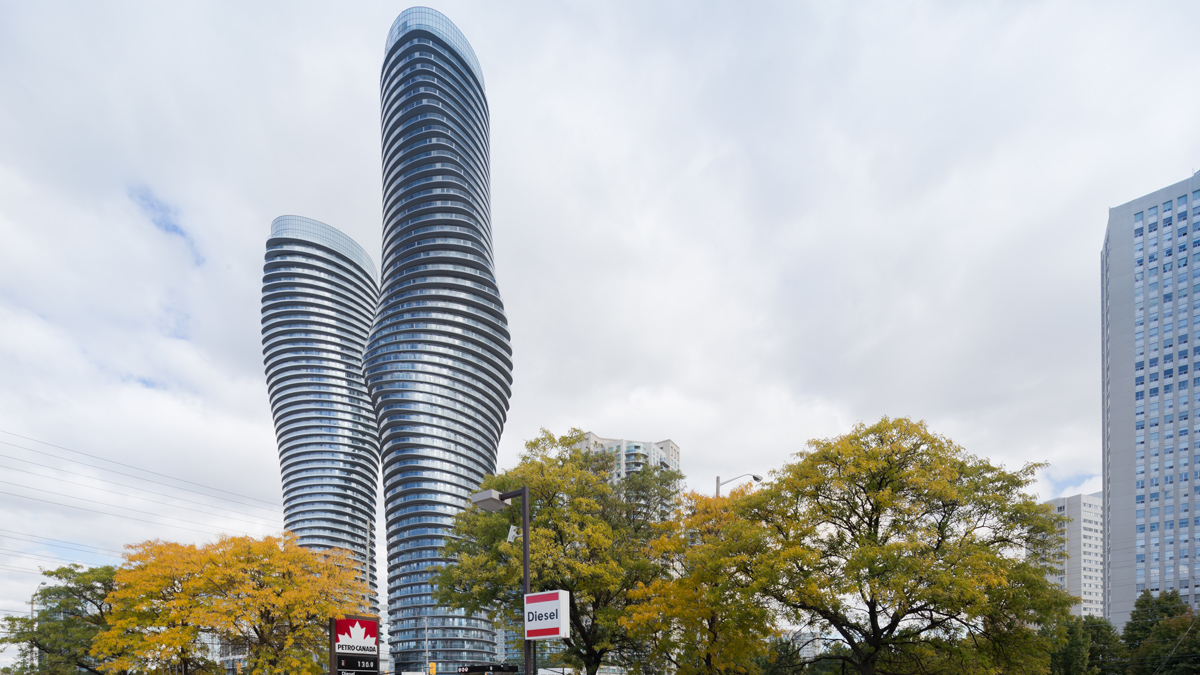
Introduction
Modernism has a famous motto: A house is a machine for living in. However, as we progress further away from the machine age, we are left with a question: what message should architecture convey? What is the house of today?
Like other fast developing suburbs in North America, Mississauga is seeking a new identity. This is an opportunity to respond to the needs of an expanding city, to create a residential landmark that strives for more than simple efficiency and that provides residents an emotional connection to their hometown.
In place of the simple, functional logic of modernism, our design expresses the complex and multiple needs of contemporary society. This building is more than just a functional machine: it responds to the significance of being located at the junction of two main streets, elegantly bearing its landmark status and acting as a gateway to the city beyond. It is something beautiful, sculptural and human.
Despite its landmark status, the emphasis is not solely on height. Our design features a continuous balcony that surrounds the whole building, eliminating the vertical barriers traditionally used in high rise architecture. The entire building rotates by different degrees at different levels, corresponding with the surrounding scenery. Our aim is to provide 360 degree views for each residential unit, and to get city dwellers in touch with the natural elements and reawaken their appreciation of nature.
The Absolute Tower has been nicknamed Marilyn Monroe by the locals.
Location: Mississauga, Toronto, Canada
Typology: Residential
2006-2012
Tower A: 45,000 sqm, 56 stories/ height 170 m
Tower B: 40,000 sqm, 50 stories/ height 150 m
Directors: Ma Yansong, Yosuke Hayano, Dang Qun
Design Team: Shen Jun, Robert Groessinger, Florian Pucher, Yi Wenzhen, Hao Yi, Yao Mengyao, Zhao Fan, Liu Yuan, Zhao Wei, Li Kunjuan, Yu Kui, Max Lonnqvist, Eric Spencer
Associate Architects: BURKA Architects INC.
Structural Engineer: SIGMUND, SOUDACK & ASSOCIATES INC.
Mechanical Engineer: ECE Group
Electrical Engineer: ECE Group
Landscape Architect: NAK Design
Interior Designer: ESQAPE Design
Interior Designer: ESQAPE Design
From: MAD Architects
Subscribe to:
Posts (Atom)